Back to Maintenance Manager for Manufacturing Main Menu
Creating a Work Order
The Add Work Order feature allows administrators, technicians, and requesters to create work orders in Maintenance Manager for Manufacturing. They can provide a description of the issue, attach supporting files, and specify scheduling requirements to ensure maintenance requests are processed efficiently.
The following steps demonstrate how to create a work order and help your maintenance teams respond quickly.
-
Navigate to the Work Orders
 icon.
icon. -
Click +Add Work Order button at the upper right corner of the page.

-
Turn on the ‘Is this an emergency?’ toggle switch if required.
-
Enter a brief description of the issue.
Example: “The Machine is not working properly"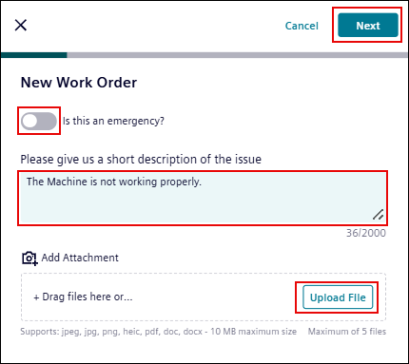
-
Under Add Attachment, click the Upload file button to add an image.
You may drag and drop to add attachments.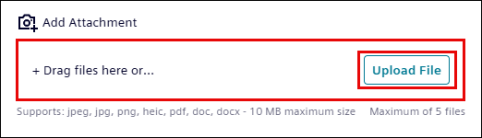
NOTE
* Supported file types: .jpeg, .jpg, .png, heic, pdf, doc and docx.
* Maximum file size:10MB, up to five files).
-
Click Next.
The New Work Order page opens, where you can add an asset -
From the Is this recurring work? list, choose how to schedule the work order:
If the work is one-time:
-
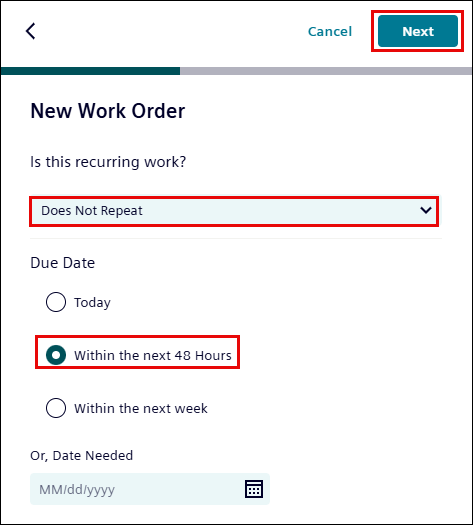
Select Does Not Repeat from the Is this recurring work? drop-down list.
-
Select a Due Date from the given options (for example, Within the next 48 Hours) or choose a specific date using the
 (Calendar) icon.
If the work is recurring:
-
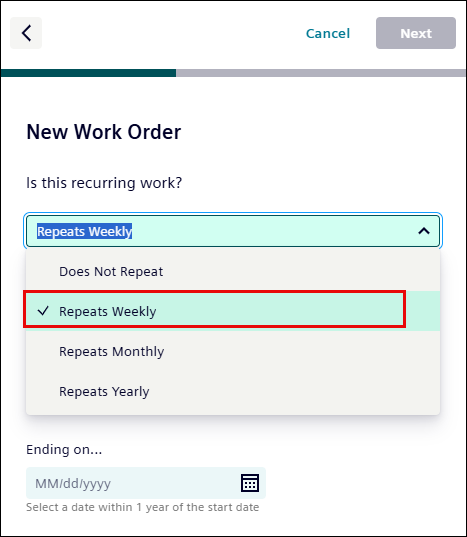
Select Repeats Weekly or any other recurring option (Repeats Monthly and Repeats Yearly) from the Is this recurring work? drop-down list.
-
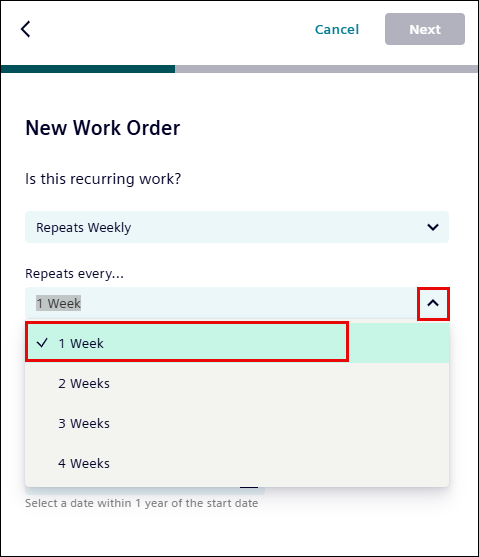
In Repeats every, select the frequency (for example, 1 Week).
-
Verify or update the Starting on date.
NOTE The Starting on field is auto filled with current date. You can change
this date, but it cannot be set it earlier than today.
-
Select the Ending on date from the
 (Calendar) icon then Click Next.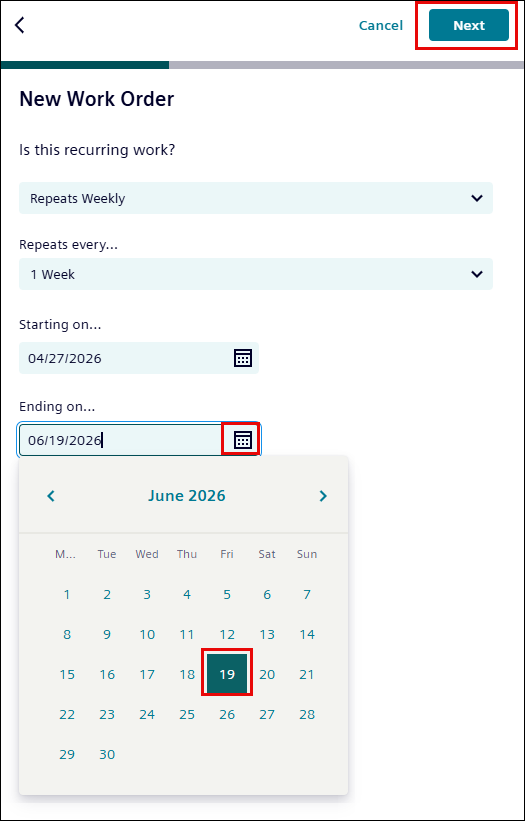
NOTE :
* For Repeats Weekly/Repeats Monthly and Ending on fields the date can be set up to 1 year.
* For Repeats Yearly and Ending on fields the date can be set up to 10 years.
After selecting the date, you are redirected to next page to select the asset.
-
Search for an asset in the search bar and select it.
-
Click Next.
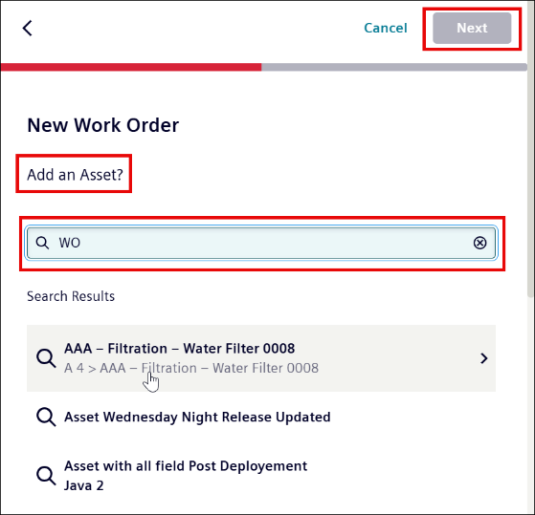
NOTE To add a new asset to the list, see Adding and Managing Assets.
-
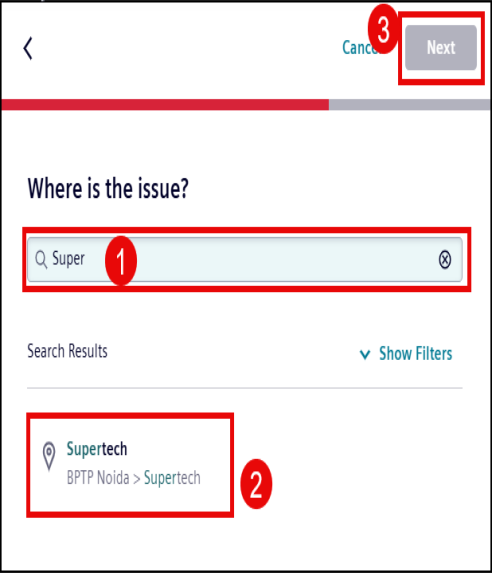
In the next tab, search and select the location of the issue and click Next.
-
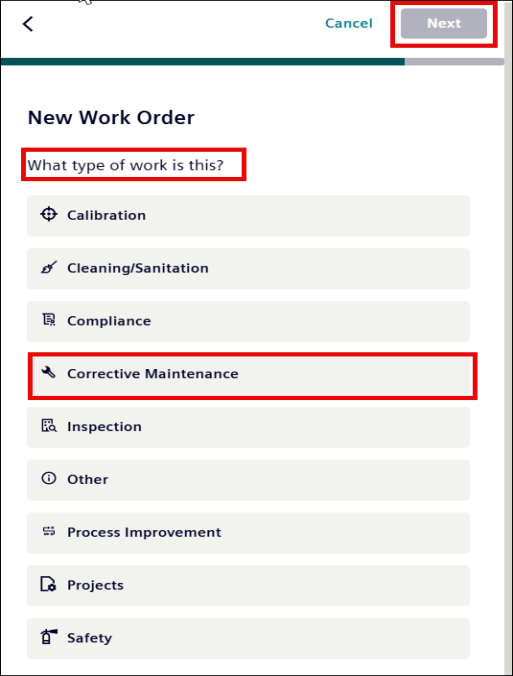
Select a type of work from the list based on the issue.
-
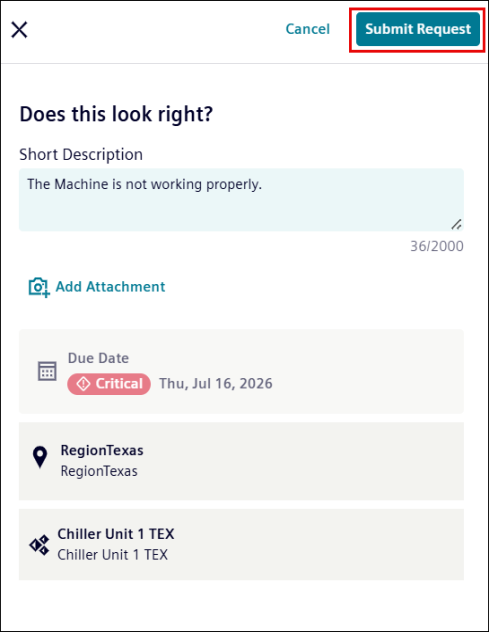
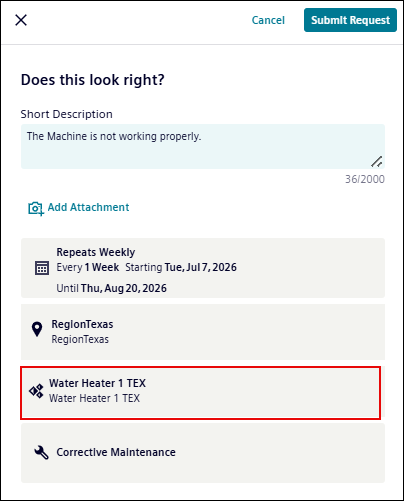
Review all entries.
-
If you want to make changes or updates, select a field you want to change or update.
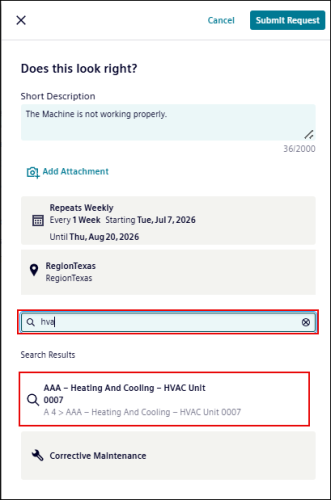
Example: To change the asset from the ‘Water Heater 1 Tex’ to ‘AAA-Heating and Cooling-HVAC Unit’.-
Click asset name field.
-
Enter or select the new asset to update.
-
-
You can also choose to Downgrade Urgency if the issue is not critical and you had turned on ‘Is this an emergency? toggle in the start.
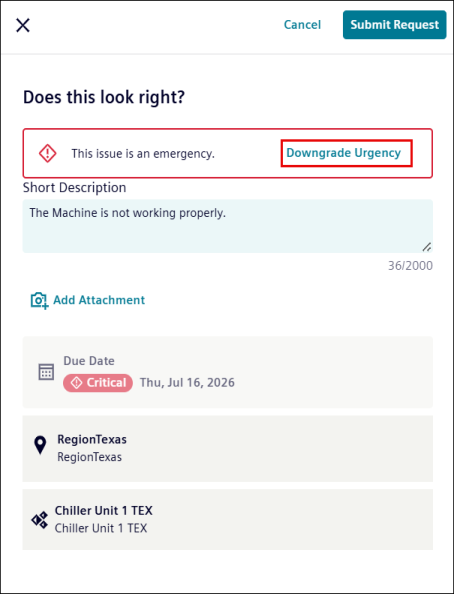
-
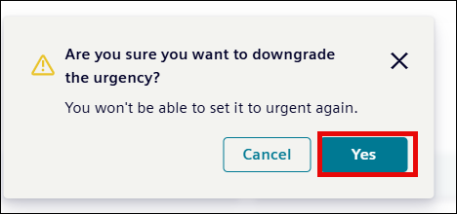
On the warning pop-up, click Yes to confirm.
-
Once you confirm this, then Critical mark on the Due Date disappears, and you can change the date as well.
-
Once all the changes are updated, click the Submit Request button to create the work order.